React Native + OpenCV— Setup Tutorial + Real Time Processing
THIS TUTORIAL STILLS IN DEVELOPMENT...This tutorial going to teach you how to setup the opencv framework together with react native to use features such as image analysis, real time processing and other tools that opencv enables us to do.
This tutorial covers android only, ( I still need to learn how to do real time processing for ios, every help is welcome )

OpenCV (Open source computer vision) is a library of programming functions mainly aimed at real-time computer vision. Originally developed by Intel, it was later supported by Willow Garage then Itseez (which was later acquired by Intel). The library is cross-platform and free for use under the open-sourceBSD license.
Yup, OpenCV
For this we use the concept of native modules that react native brings us to work with high performance, and frameworks that we could only use using native code (like opencv).
Check it out, Native Modules
Here we go.
Part 1 — Setup OpenCV Folders
First Step: Download OpenCV 4.1.1 for Android
https://opencv.org/releases/2: Create a React Native project with Expo (In my case called “corretor”)
expo initNotes:
- Choose a template: expo-template-bare-minimum
- What would you like to name your app? realtimeprocessing
3: In your root folder of example projet, navigate to folder “android/app/src/main”
3.1: Create a folder called “jniLibs”, the path of folder stay like: “android/app/src/main/jniLibs”
4: Extract the downloaded opencv zip file and navigate to “OpenCV-android-sdk\sdk\native\libs”
4.1: Copy the content of opencv folder “libs” and past in the “jniLibs” folder in your project.

Part 2 — Import OpenCV library in Android
First Step: Open your android folder of the react native project in Android Studio

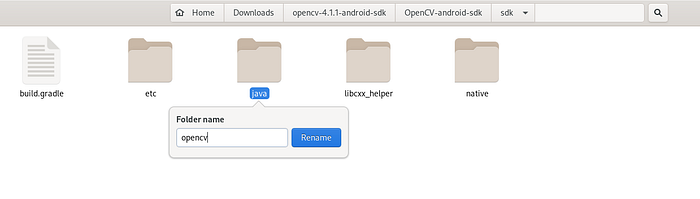
1.1: Rename the downloaded opencv sdk/java folder to opencv
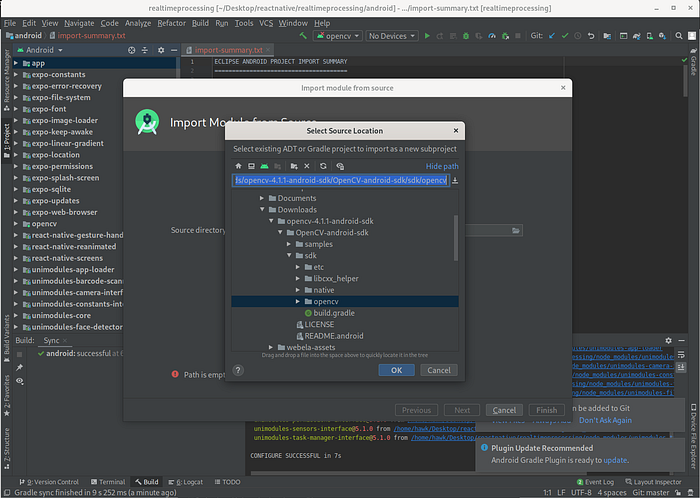
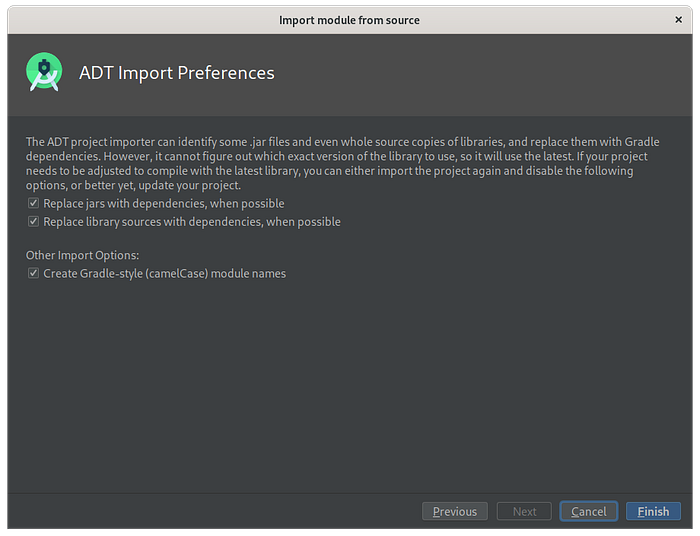
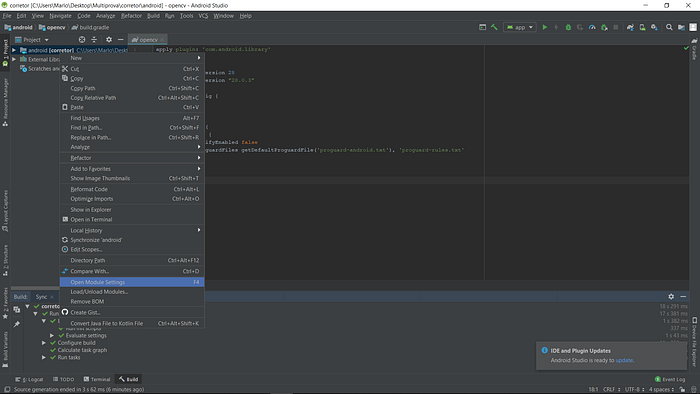
2: In Android Studio, select File -> New -> Import Module and search the sdk/opencv in extracted opencv folder
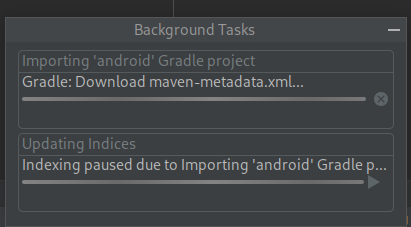
2.1 Wait for the Background Tasks
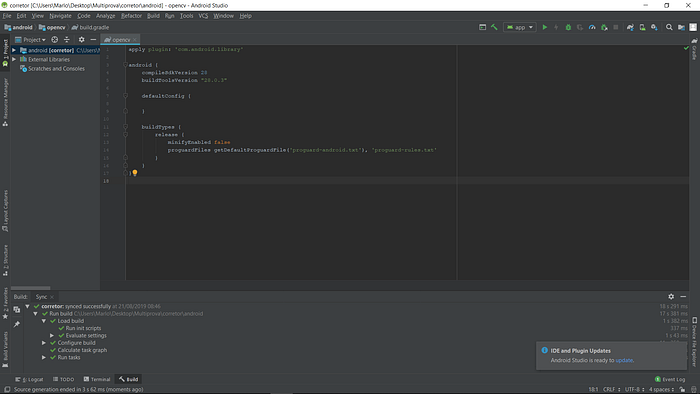
3: Update the build.grade file imported in OpenCv library and add the following properties:
- compileSdkVersion
- buildToolsVersion
Obs: The versions have to be the same of “android/build.gradle”
3.1: Change this line
apply plugin: 'com.android.application'to
apply plugin: 'com.android.library'3.2: Delete the line [applicationId “org.opencv”]
3.3: Sync the project (File -> Sync Project With Gradle Files)
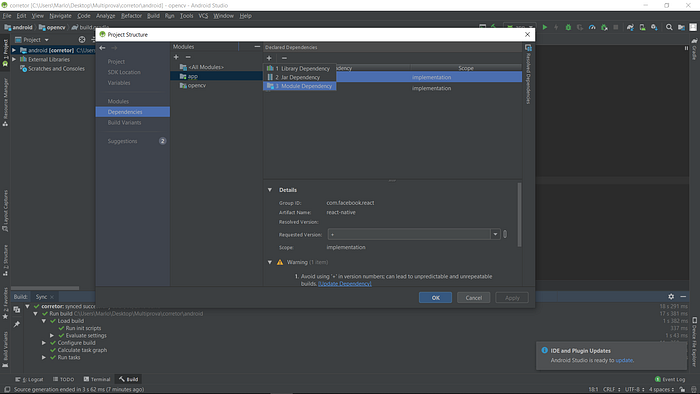
4: Add Module Dependency

Part 3 — Implement OpenCV in React Native Project
First Step: Add OpenCV camera layout in “android/app/src/main/res/layout/camera_layout.xml”
<?xml version="1.0" encoding="utf-8"?><FrameLayout xmlns:android="http://schemas.android.com/apk/res/android"xmlns:opencv="http://schemas.android.com/apk/res-auto"android:layout_width="match_parent"android:layout_height="match_parent"><org.opencv.android.JavaCameraViewandroid:id="@+id/camera_view"android:layout_width="match_parent"android:layout_height="match_parent"android:visibility="gone"opencv:camera_id="@+id/camera_view"opencv:show_fps="false" /></FrameLayout>
2: In your package folder in “android/app/src/main/java/com/realtimeprocessing” add the following native modules:
2.1: CameraViewManager.java
package com.realtimeprocessing;import com.facebook.react.uimanager.SimpleViewManager;import com.facebook.react.uimanager.ThemedReactContext;import android.app.Activity;import android.content.BroadcastReceiver;import android.content.Context;import android.content.Intent;import android.content.IntentFilter;import android.support.annotation.Nullable;import android.util.Log;import android.view.LayoutInflater;import android.view.ViewGroup;import android.widget.FrameLayout;import android.view.SurfaceView;import org.opencv.core.Core;import org.opencv.core.CvType;import org.opencv.core.Mat;import org.opencv.core.MatOfRect;import org.opencv.core.MatOfPoint;import org.opencv.core.Point;import org.opencv.core.Rect;import org.opencv.core.Scalar;import org.opencv.core.Size;import org.opencv.imgproc.Imgproc;import org.opencv.objdetect.CascadeClassifier;import org.opencv.android.CameraBridgeViewBase;import org.opencv.android.BaseLoaderCallback;import org.opencv.android.LoaderCallbackInterface;import java.lang.ref.WeakReference;import java.util.ArrayList;import java.util.List;public class CameraViewManager extends SimpleViewManager<FrameLayout>implements CameraBridgeViewBase.CvCameraViewListener2 {public static final String REACT_CLASS = "CameraViewManager";public CameraBridgeViewBase cameraBridgeViewBase;private Mat mRgba;private Mat mIntermediateMat;private Mat mGray;@Overridepublic String getName() {return REACT_CLASS;}@Overridepublic FrameLayout createViewInstance(ThemedReactContext context) {LayoutInflater inflater = LayoutInflater.from(context);final FrameLayout preview = (FrameLayout) inflater.inflate(R.layout.camera_layout, null);WeakReference<ViewGroup> layoutRef = new WeakReference<ViewGroup>(preview); // constructor parameters pass itcameraBridgeViewBase = (CameraBridgeViewBase) preview.findViewById(R.id.camera_view);cameraBridgeViewBase.enableView();cameraBridgeViewBase.setVisibility(SurfaceView.VISIBLE);cameraBridgeViewBase.setCvCameraViewListener(this);return preview;}@Overridepublic void onCameraViewStarted(int width, int height) {mRgba = new Mat(height, width, CvType.CV_8UC4);mIntermediateMat = new Mat(height, width, CvType.CV_8UC4);mGray = new Mat(height, width, CvType.CV_8UC1);}@Overridepublic void onCameraViewStopped() {}@Overridepublic Mat onCameraFrame(CameraBridgeViewBase.CvCameraViewFrame inputFrame) {mRgba = inputFrame.rgba();// Frame processing code herereturn mRgba;}}
2.2: ScannerModule.java
package com.realtimeprocessing;import com.facebook.react.bridge.NativeModule;import com.facebook.react.bridge.ReactApplicationContext;import com.facebook.react.bridge.ReactContext;import com.facebook.react.bridge.ReactContextBaseJavaModule;import com.facebook.react.bridge.ReactMethod;import com.facebook.react.bridge.Promise;import java.util.Map;import java.util.HashMap;public class ScannerModule extends ReactContextBaseJavaModule {public ScannerModule(ReactApplicationContext reactContext) {super(reactContext);}@Overridepublic String getName() {return "ScannerExample";}@ReactMethodpublic void getText(Promise p) {p.resolve("OK!");}}
2.3: ScannerPackage.java
package com.realtimeprocessing;import com.facebook.react.ReactPackage;import com.facebook.react.bridge.NativeModule;import com.facebook.react.bridge.ReactApplicationContext;import com.facebook.react.uimanager.ViewManager;import java.util.ArrayList;import java.util.Collections;import java.util.List;import java.util.Arrays;public class ScannerPackage implements ReactPackage {@Overridepublic List<ViewManager> createViewManagers(ReactApplicationContext reactContext) {return Arrays.<ViewManager>asList(new CameraViewManager());}@Overridepublic List<NativeModule> createNativeModules(ReactApplicationContext reactContext) {List<NativeModule> modules = new ArrayList<>();modules.add(new ScannerModule(reactContext));return modules;}}
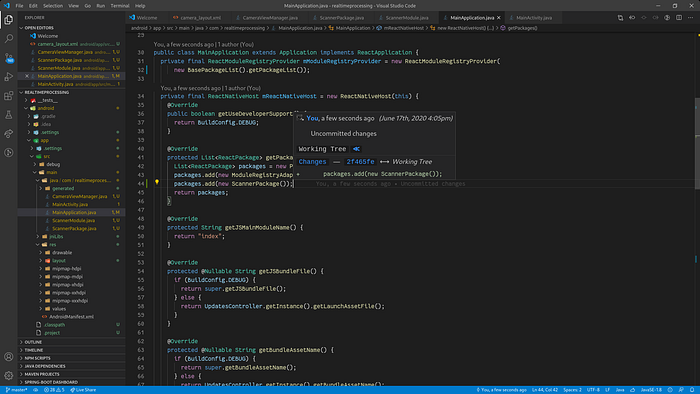
2.4: Update your MainApplication.java and add “new ScannerPackage()” in package list.
3: Import OpenCV camera in JS files
3.1: In your project root create a file “src/native/OpenCVCamera.js” and add the following code:
import { requireNativeComponent, ViewPropTypes } from "react-native";module.exports = requireNativeComponent("CameraViewManager", null);
3.2: In App.js insert the following code:
/*** Sample React Native App* https://github.com/facebook/react-native** @format* @flow*/import React from 'react';import {View} from 'react-native';import OpenCVCamera from './src/native/OpenCVCamera';const App = () => {return (<View style={{flex: 1}}><OpenCVCamera /></View>);};export default App;
